A dimensioning to the topography can be helpful for the documentation of segments, ducts and cable sections with their respective point elements, such as fittings or closures.
These dimensions are differentiated into aligned and orthogonal dimension. For each dimension, the lines, points and labels are managed in their own feature classes.
The dimensioning option described here only works for projects in Oracle or PG databases. The dimensioning in SQLite files must be created with the AutoCAD dimensioning (see Autodesk AutoCAD Map 3D help).
Aligned dimension
Aligned dimensioning is used to document simple distances. An aligned dimensioning is created by the Industry Model Explorer.
Creating an aligned dimensioning
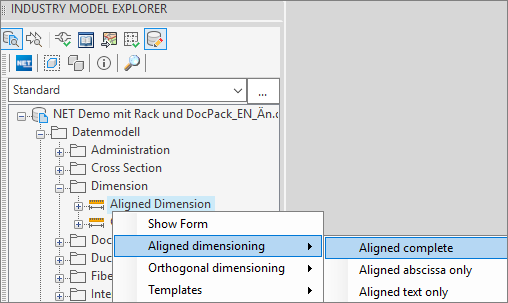
1. Start the aligned dimensioning in the Industry Model Explorer > Dimension > Aligned dimension > Aligned complete.

2. Select the start point of the dimensioning. Pay attention to the object snap.
3. Select the endpoint for the dimensioning. Pay attention to the object snap.
4. Result: one point has been dimensioned.
Orthogonal Dimension
Orthogonal Dimension is used to dimension multiple objects on a line. An orthogonal dimension is created by the Industry Model Explorer.
Creating an orthogonal dimension
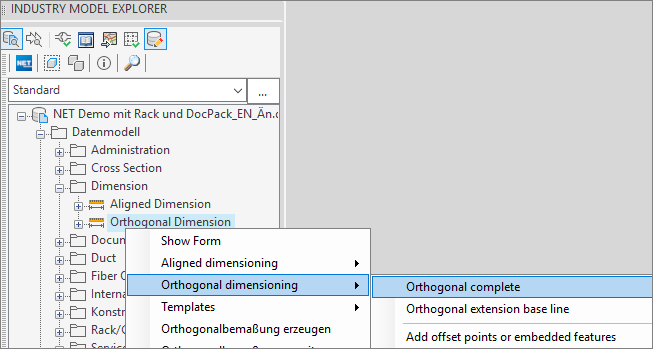
1. Start the orthogonal dimensioning in the Industry Model Explorer > Dimension > Orthogonal dimension > Orthogonal complete.

2. Select the starting point of the abscissa. Pay attention to the object snap.
3. Select the end point of the abscissa. Pay attention to the object snap.
4. Select the points to be dimensioned as offset points. Pay attention to the object snap.
5. Result: A segment has been dimensioned orthogonally on a building front.