The following articles deals with the procedure, settings and handling of the rules when using the atesio optimizer.
Special feature of the atesio optimizer
The atesio optimizer calculates the network from the end customer to the backbone point. At least the backbone point must be specified to the optimizer.
The distribution locations, POP locations, clusters, trench courses including ducts and cables are then optimized, taking into account the settings in the rules.
Homes Passed+ Explanation of topic
HP (Homes Passed)
Homes Passed means that streets are developed without a
without prepared branches in the longitudinal road.
HP+ (Homes Passed Plus)
In the case of Homes Passed Plus, a micropipe is branched off from the Longitudinal trench micropipe bundle just over the property line onto the end customer's property without entering it.
This means that once the Longitudinal trench is completed, there is no longer any need for civil engineering in the public area, including the corresponding applications and approvals from the local authorities. It will be possible during the construction of the building connection, the work continues directly on the private property.
Consideration in atesio optimizer
For the detection of the HP, HP+, HC network, the atesio optimizer has been extended with appropriate functions.
Trench network classification
Lead-in trenches are split at the property boundary (if available) when creating the trench network.
Requirements for the input data
The parcels must be present in the project in the NET Design data model. If the parcels do not have any specification regarding the attribute "is private:", the command "ATESIOSETPARCELPRIVATE" can be used:
- Parcels where no street centerlines run are set to "Private: Yes"
- Parcels in which a street centerline runs or crosses it are set to "Private: No"
Opening the Optimizer Settings
The planning settings are entered via a user-friendly dialog. In the Start Panel of the NET Design tab you will find the buttons:
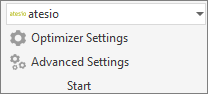
- to select the optimizer
- to open the Optimizer Settings (planning settings)
- and for the advanced settings.
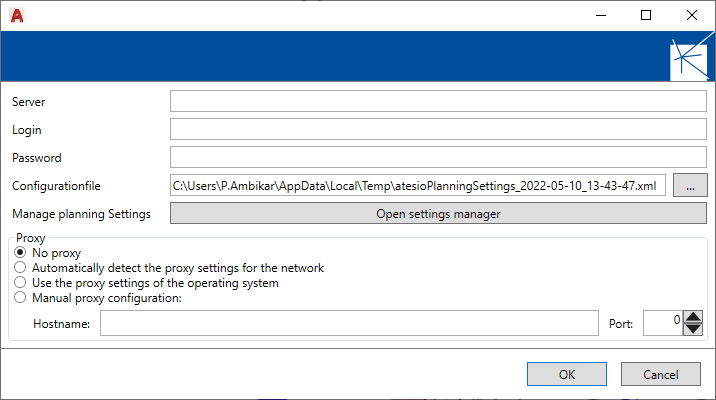
Optimizer Settings
Clicking on “Optimizer Settings” opens the Start dialog for the initial settings. Here, depending on the provision of the atesio optimizer, the corresponding fields are populated.
The currently used planning rule can be found under “Configurationfile”. Click on the jump button “…” to access the file. The file is stored directly in the design project.
Click on the “Open settings manager” button to access the planning settings. These can be edited and saved.
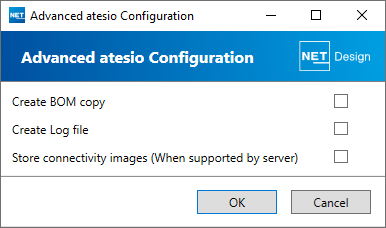
Advanced Settings
Additional options can be activated by activating the checkbox.